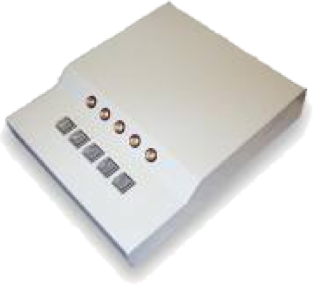
A built-in feature in the Lumina 3G controller give it the ability to emulate the PST Serial Response Box Model 200A shown on the right. This enables the Lumina fMRI response pads to seamlessly work with PST’s E-Prime software. This document shows you how to enable this feature.
Two features make it possible to connect a Lumina controller to E-Prime.
The first one is the USB driver that it uses. A driver is a small program that is needed by most USB devices (other than keyboards, mice, and so forth). When installed, the USB driver makes Windows think that a serial port has been installed, and E-Prime knows how to communicate with a serial port.
The second feature is the built-in PST Serial Response Box Model 200A emulation. This saves you time by not having to write E-Basic code since E-Prime already knows how to “talk” to the Model 200A.
Before you proceed, please make sure to install the USB driver if it has not been done already.
Setting your Lumina controller to use the SRB Model 200A protocol is done from the front panel:
•
Press the Set button. The Standard LED will start blinking.
•
Press the Set button again. One of the “Using” LEDs will start blinking. Press the arrow ➜ button until E-Prime is selected.
•
Press the ➜ button until 19200 is selected.
•
Press Set again.
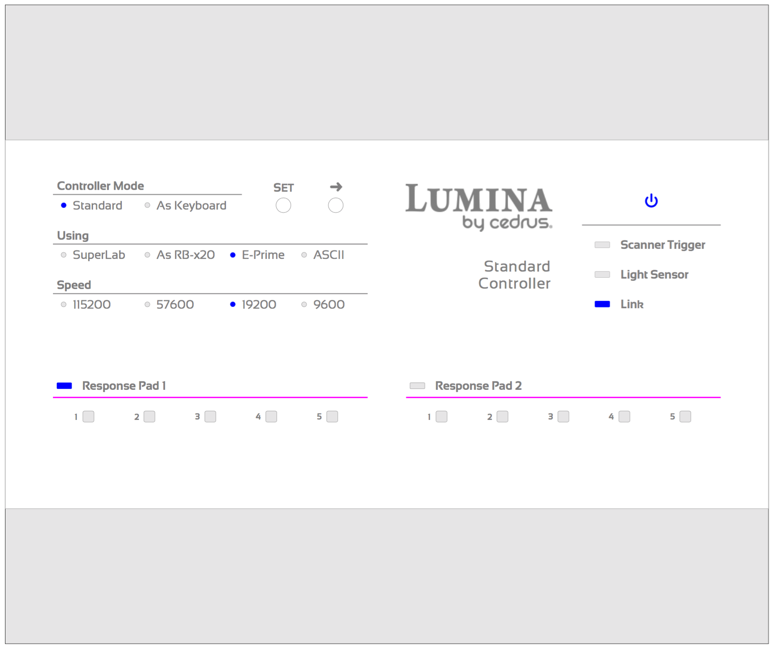
The SRB Model 200A has five push buttons versus four for the Lumina LP-400. The following illustration shows how they correspond to each other.
Push button 1 in the illustration corresponds to the leftmost button on the SRB Model 200A. Push button 5 on the SRB Model 200A (the rightmost one) corresponds to Lumina’s scanner trigger input. This can be used to synchronize the presentation of a trial with the start of a scan.
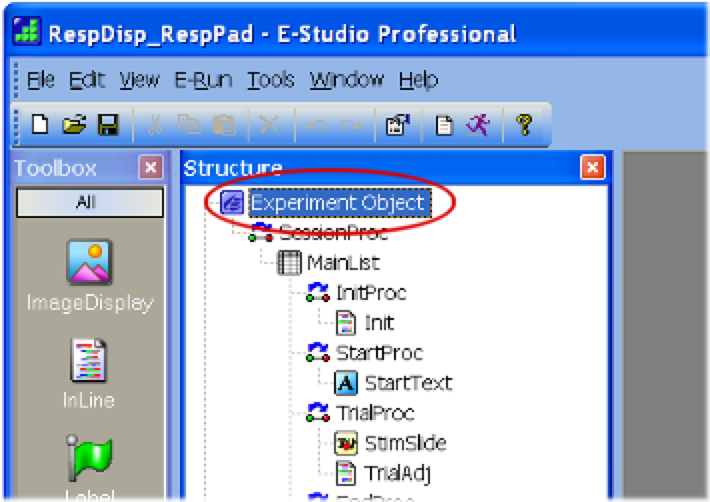
The following screen snapshots were taken using E-Prime 2.0 and might look a little different for other versions; they used this file as a demo.
1.
In E-Prime, double-click on the Experiment Object:
2.
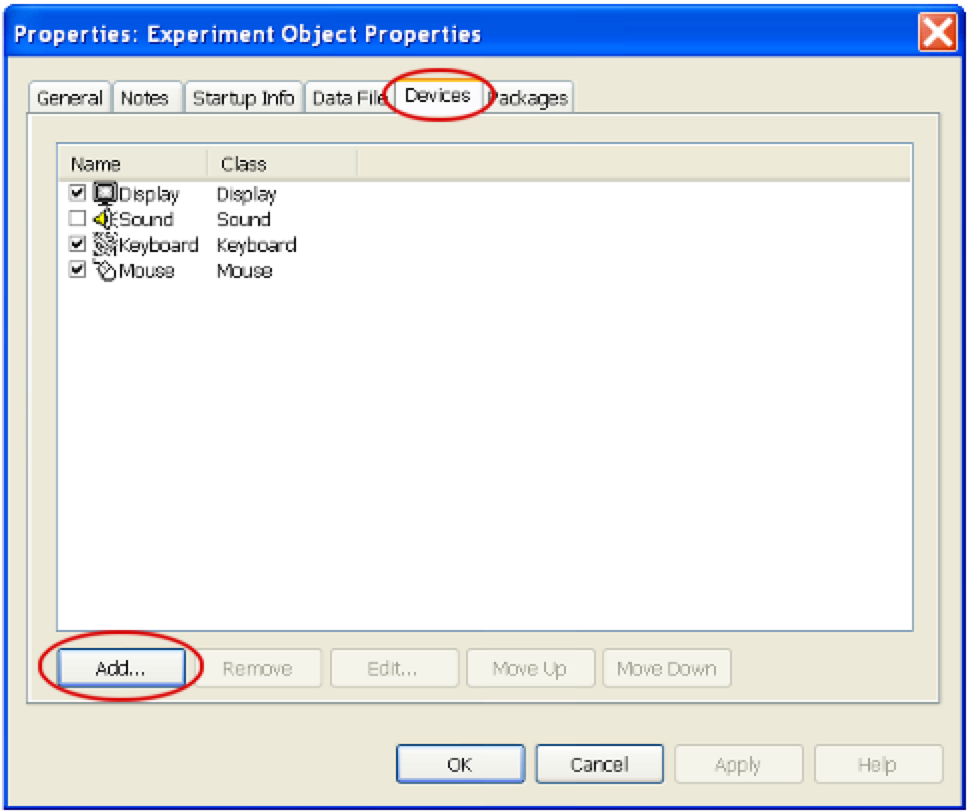
The Experiment Object’s Properties dialog (screen) will appear. Click on the Devices tab, then click on the Add… button.
3.
The Add Device dialog will appear. Select the SRBOX icon then click on OK:

4.
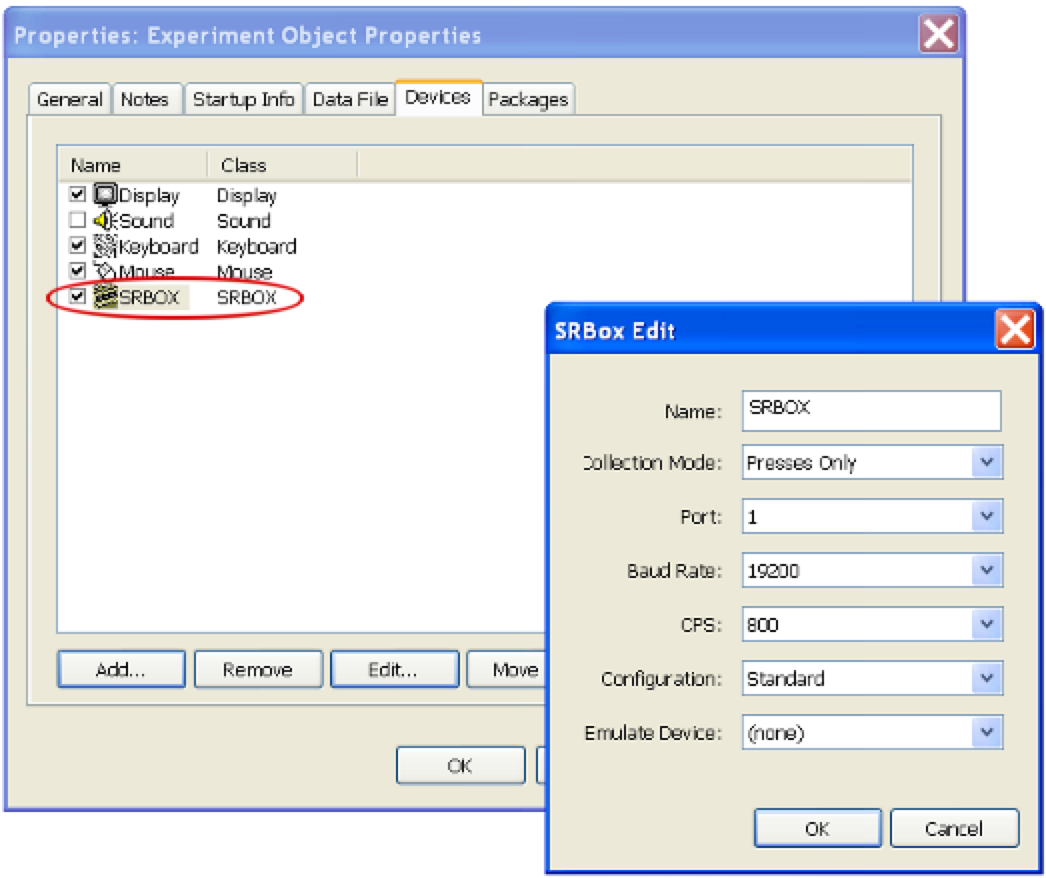
Back in the Experiment Object’s Properties dialog, you will now see “SRBOX” listed. Double-click on it to edit its properties; the SRBox Edit dialog will appear.
5.
In the SRBox Edit dialog, set the right configuration. The most important one (and the one that users often get wrong) is Port. A value of 1 refers to COM1, 2 refers to COM2, and so forth. This needs to be set to whatever COM port Windows thinks that the response pad is connected to.
6.
Make sure that Baud Rate matches what your response device is set to.
7.
Click on OK to close the SRBox Edit dialog.
8.
Click on OK to close the Experiment Object’s Properties dialog.
This completes setting up the response device for use with E-Prime.
Back in the main E-Prime window:
•

Double-click on StimSlide.
•
Double-click on the StimSlide properties icon. This will invoke the StimSlide Properties dialog.
•
In that dialog, click on the Duration/Input tab.
•
Click on the Add… button. The Add Input Device dialog will appear.
•
Select the SRBOX icon and click on OK.
Back in the StimSlide Properties dialog, you can set the input properties as needed by your experiment, e.g. Time Limit and End Action.
Is USB Driver Installed?
One way to verify that the response pad’s USB driver has been properly installed is to open the Device Manager and look under the section named “Ports (COM & LPT)”. When you plug the response pad, and if the driver is installed correctly, a new entry should appear under that entry, e.g. “USB Serial (COM4)”. When you unplug the response, this entry should disappear.
Another way is to download SuperLab and use its Auto Detect feature. After installing SuperLab and running it:
•
Press the Set and arrow buttons on the front panel until the SuperLab LED is selected.
•
In SuperLab, click on the Experiment menu and select Participant Input. A dialog appears.
•
Turn on the checkbox for “Lumina MRI Pads”
•
Click on the Setup tab
•
Press on the Auto Detect button
If SuperLab can detect the presence of the Lumina controller, then the USB driver is installed and functioning properly.
E-Prime Run-Time Error 10051
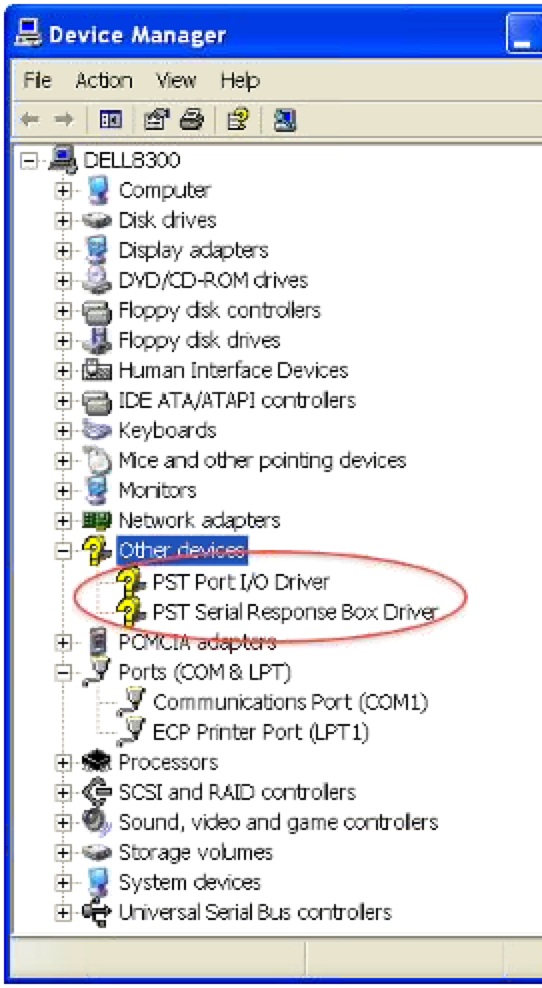
E-Prime run-time error 10051 is most often due to one or both of E-Prime’s drivers not being installed. When installed correctly, two device drivers must be listed in the Device Manager, as illustrated in the screen snapshot.
To run the Device Manager in Windows XP:
•
Click on the Start button and right-click on “My Computer”; a menu appears
•
Click on Properties; a window labeled “System Properties” shows up
•
Click on the Hardware tab
•
Click on Device Manager button
To open the Device Manager in Windows 7:
•
Click on the Windows logo button, usually found in the bottom left corner of your screen
•
Right-click on “Computer”; a menu appears
•
Select Properties; a window appears
•
Click on Device Manager, found on the left
First Response is Missing
When you run an E-Prime experiment, the first “response” from the response pads will likely be the wrong one and will occur without the participant pressing any key. If this happens, we suggest that you insert a code at the start of the experiment to get a response and then just ignore it. All subsequent responses from the participant will be the correct ones.
E-Prime Doesn’t Find the Response Pad
In some instances, it is possible that E-Prime will not “see” the response pad after you turn on your computer. Another symptom might be that the mouse cursor will start moving erratically. The solution is to unplug the USB cable from the response pad before turning the computer on, and then plug it back after the computer has completed its startup.
The reason is this: the Lumina controller works by emulating the PST Serial Response Box Model 200A, which in turn works by sending a constant stream of bytes to the computer all the time. When starting up your computer, Windows tries to be smart and checks all the computer ports (serial, parallel, USB). When it sees this constant stream of data coming, it thinks that the computer has a mouse connected. Unplugging the USB cable during startup gets around this.
COM Port Out of Range
E-Prime 1.x had a limitation where it could only open COM ports 1 through 4. When installing the USB driver, Windows will sometimes assign a COM port number that is higher than 4. See the document Determining or Changing the USB Driver’s COM Port Setting for assistance in reassigning the USB driver’s COM port number.
Incorrect COM Port or Baud Rate
It is imperative that the correct COM port be specified in E-Prime. The response pad will be listed in the Device Manager under the section “Ports (COM & LPT)”. For example, if the name ends with COM3, then you should specify 3 as the port number in the “SRBox Edit” dialog in E-Prime.
The baud rate, or speed, settings in E-Prime and the response pad must also match. E-Prime supports 9600 and 19200 baud, as does the response pad. It does not matter which baud rate you use as long as they match, but 19200 is recommended.
Last revision: Mar 9, 2016
PRODUCTS
SUPPORT
STAY IN TOUCH
© Copyright 2026 Cedrus Corporation, P.O. Box 6309, San Pedro, CA 90734 - USA
Phone: +1-310-548-9595. Send us an email
qwerasdf