Before delving into programming, it is often useful to be able to send commands directly to StimTracker to test things out. This tech note illustrates how to use a free program, RealTerm, to send such commands. Its user interface is not the most intuitive, but some StimTracker commands require sending a binary value, and RealTerm handles this well.
The first step is to download RealTerm and install it. Also, the USB driver for StimTracker must already be installed.
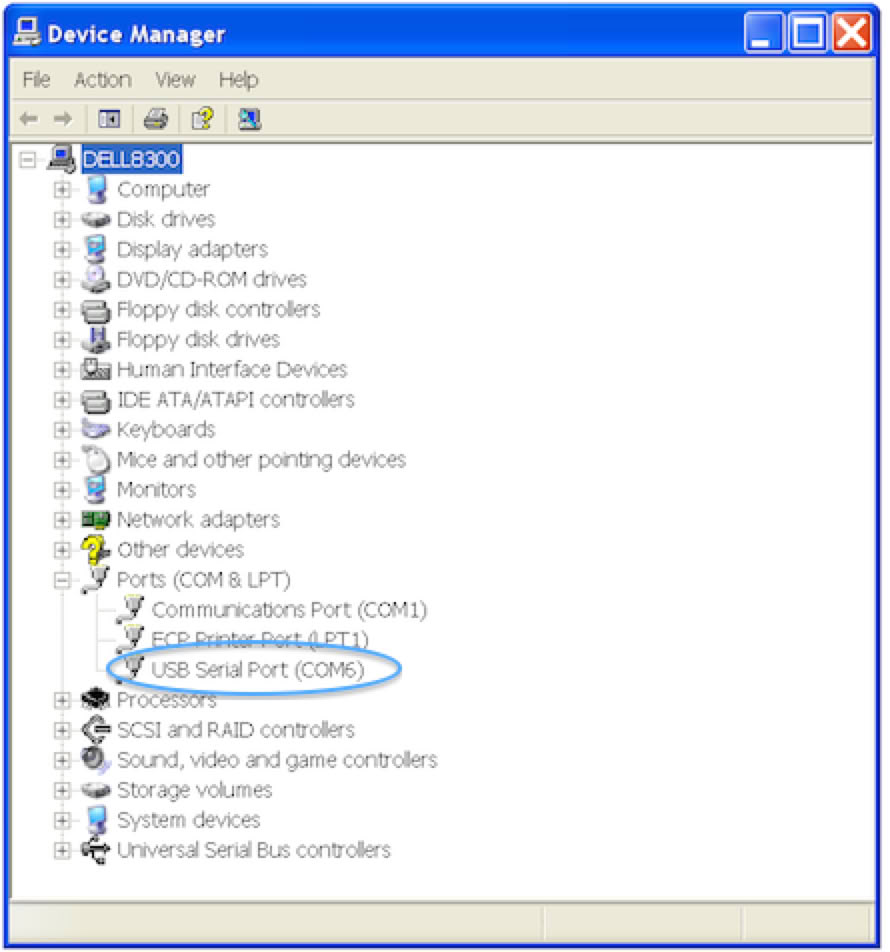
Next, we need to determine which COM port number has been assigned to StimTracker.
•
Open the Device Manager. Instructions on how to open the Device Manager change from one Windows version to another. Please use search if you are not sure how.
•
Expand the “Ports (COM & LPT)” section.
•
When StimTracker is turned on, you should see an entry under “Ports (COM & LPT)” named “USB Serial Port (COMx)”. where x is a number between 1 and 255. Note down the COM port number: we will need it.
We will start by sending a basic command to tell StimTracker to identify itself. We do this mainly to verify that communication between StimTracker and your computer has been established.
•
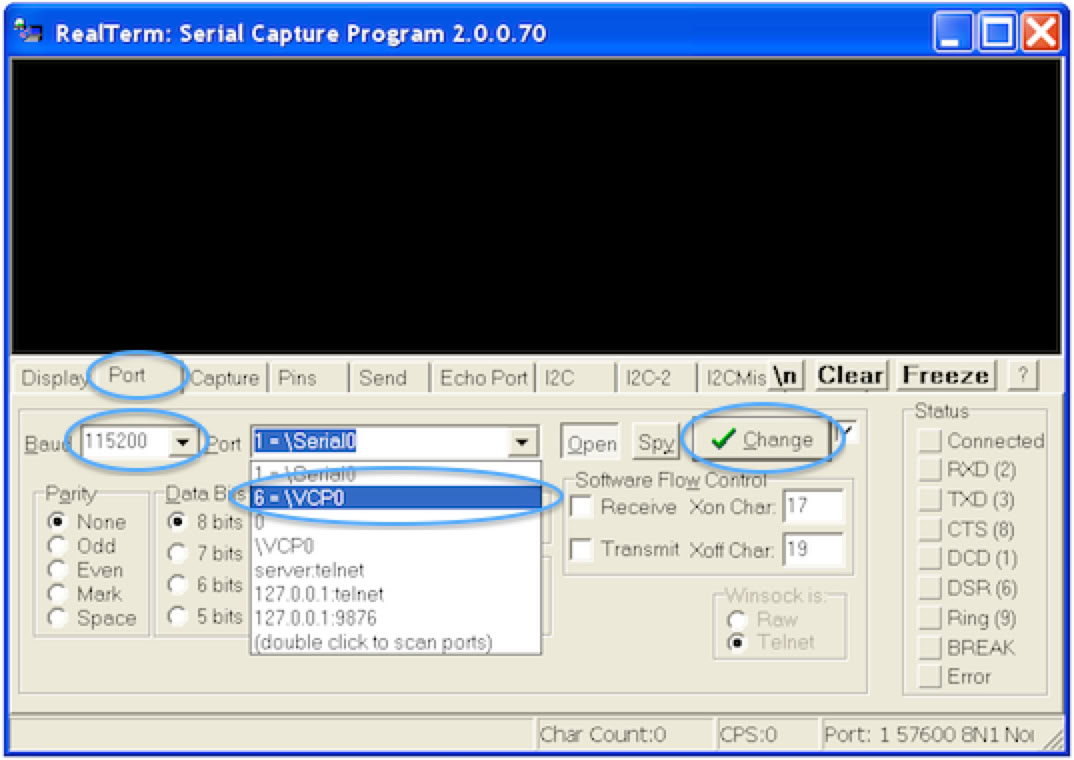
Run RealTerm
•
Click on the Port tab
•
Change Baud setting to 115200
•
Click on the Port dropdown menu. Alas, RealTerm does not simply display “COM6” (or whatever your port number is). Instead, it displays “6” followed by “VCP” to indicate that it is a Virtual COM Port.
•
Select your port number
•
Click on the Change button to apply the new settings
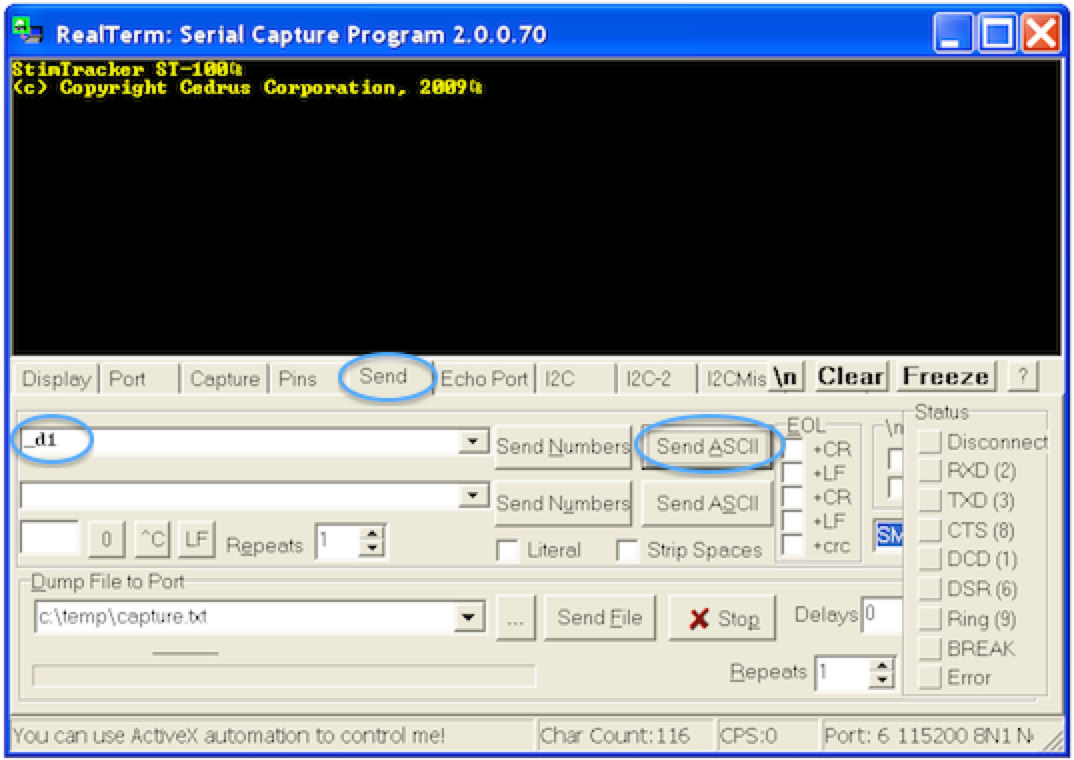
Now that RealTerm is set up, let’s send a _d1 command. This tells StimTracker to send back its full name (see list of StimTracker Software Commands).
•
Click on the Send tab
•
Type “_d1” in the edit field where shown
•
Click on the Send ASCII button
A pulse can be sent using the mh command. 255 different event codes can be produced by sending pulses on up to 8 lines at the same time.
Using mh is slightly more complicated than using _d1 because it involves sending a binary value to indicate which of lines the pulse should be sent on. In this context, “binary value” means that the byte of information cannot be easily represented by a text character.
As described in the StimTracker Software Commands page, the entire command consists of four bytes:
•
Letter m, which corresponds to number 109 (its ACSII value)
•
Letter h, which corresponds to number 104
•
A number indicating which lines we want to send the pulse on. For testing purposes, we will send value 255 to send a pulse on all eight lines. This makes it easier to see things on your EEG, eye tracker, or other recording software.
•
The last number is reserved for future use and should always be 0.
Continuing where we left off in RealTerm’s Send tab:
•
Type “109 104 255 0” in the edit field shown.
•
Click on the Send Numbers button. Note: you can type in either edit field; it doesn’t matter as long as you click on the Send Numbers button that is next to it.
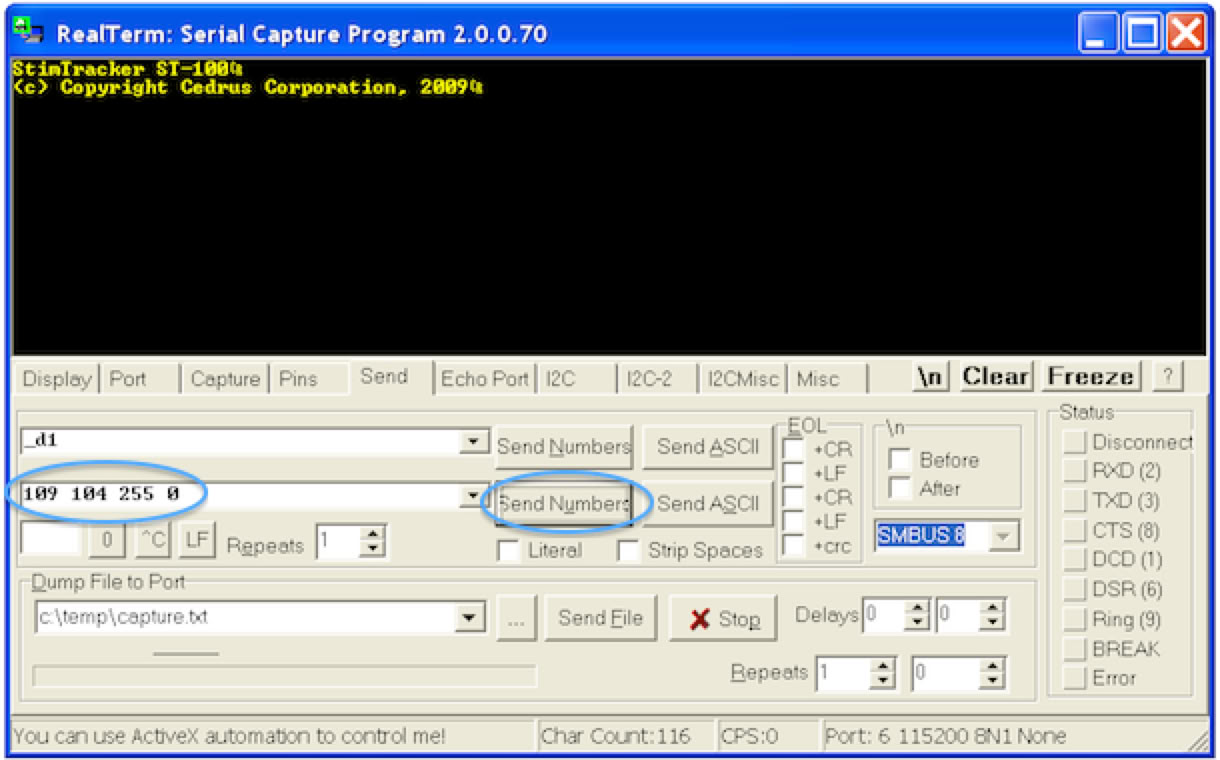
When you click on the Send Numbers button, you should see the “Markers” blue LED light flash on StimTracker’s front panel.
StimTracker implements a 100 millisecond timeout for commands. This means that you cannot have more than a 100ms delay in between bytes being sent as command.
You can control the duration of the pulse being sent using the mp command (binary values 109 and 112).
Last revision: October 21, 2013
PRODUCTS
SUPPORT
STAY IN TOUCH
© Copyright 2026 Cedrus Corporation, P.O. Box 6309, San Pedro, CA 90734 - USA
Phone: +1-310-548-9595. Send us an email
qwerasdf